
Alright, it’s time to properly implement the Bandsaw controls. The VFD has a number of handy options which are a product of 3 phase power. That means we can futz with the electrical phase frequency in order to use this as an AC electric motor speed controller. First we’re going to implement a run/stop button and a couple speed control buttons so we can switch from metal to wood on the fly.
Check out part one if you haven’t already
Here’s the parts list:
https://whathavewelearned.myshopify.com/collections/bandsaw-2
So after a few hours of trying to convert the manual from broken English to actual English I figured out we need a button on the VFD terminal X4 for our start/stop control. So I wired up a button and gave it a test. Well crap. You have to hold down the button to keep the motor running. That’s going to be a bit inconvenient. So we need latching buttons. We also need to change a setting. P11 needs to be changed to 2 for external port (which on this VFD is port X4, which is not specified in this section of the manual).
This is probably specific to a XCFDP VFD which I can not find with my supplier so I had to get them on Amazon. I did find a similar one you can find in my store but definitely verify my steps if you’re going to try to apply the same process to this controller and make sure to review my disclaimer.
Alright so now we’ve got a few latching buttons and some momentary buttons. Next we need a panel to mount the buttons.

Here is the original control. This thing just had an electro-mechanical contactor before, basically a big multi-pole relay. I wanted to use these buttons but there was a few problems, First and foremost the stop button is normally closed. I have no way to use that and after taking the unit apart there was no way to change it so out go those buttons.
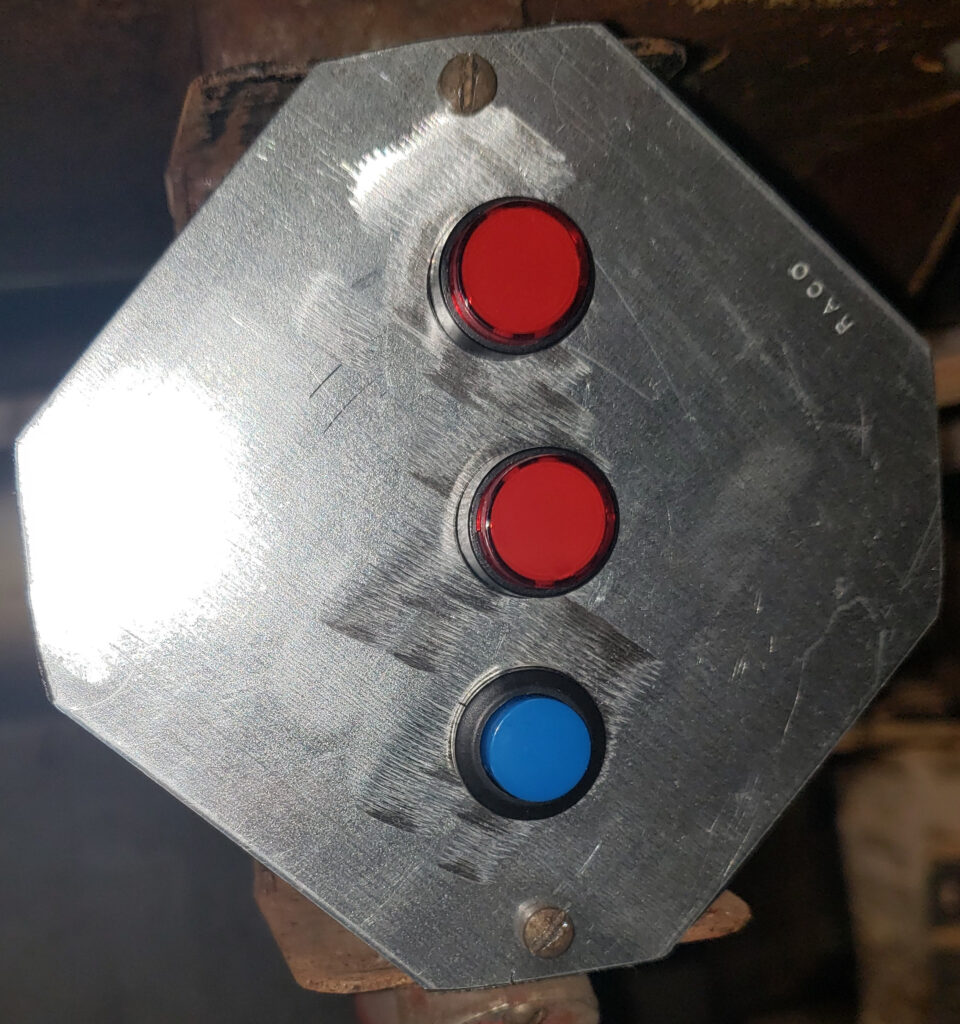
I have a stack of metal 2 gang flat electrical box covers laying around (these are handy for all kinds of things) so I transferred the mounting holes from the original button cover to one of those, lopped off the corners, drilled holes for the buttons (5/8 inch for these) and mounted the buttons in the holes. Fortunately the momentary buttons are the same size as the latching buttons because I found out a bit later the speed controls also only work while the pin is energized (so basically you would have to hold down a momentary button again). So once again the top button is connected to the common terminal on the VFD and the X4 terminal and voila, button in, blade go, button out, blade stop.
I also changed the VFD setting on P12 to 0. This is the stopping method. I just changed it to stop with inertia because I don’t want any additional work for the VFD. You could use it to electronically brake the motor if you wanted.

These buttons have lights and things in them which I have no interest in using so I just left them hanging because I don’t care.
Speed Controls
Now we need the speed controls. I’m looking for around 400 ft/min for metal and maybe 1000 for wood. We’ll find out in a moment this isn’t going to happen, not those speeds anyway.
So terminal X1 is the input port for Speed Selection 1 which is stored in P27 and X2 is Speed 2 which is stored in P28. After a bit of testing I determined dropping the frequency low enough to hit 400 ft/min, something like 5hz, just isn’t feasible. The motor has so little torque any blade pressure will stall it. Likely other bad things will happen as well like the motor getting hot to the point of failure because we’re basically shunting the power when the motor crosses the portion of its frame between the coils. The slower it spins the more time is spent in these positions and that’s simply not how it’s designed to work.
Ideally at this point I would change the pulley ratio to slow it down further. I’m not doing that, at least not right now. There is plenty of room in the housing for an additional pulley but that is a huge amount of work, getting material, cutting pulleys on the lathe, getting the bearings just right, locating the right belts, etc. Maybe some day in the future we’ll mess with that.
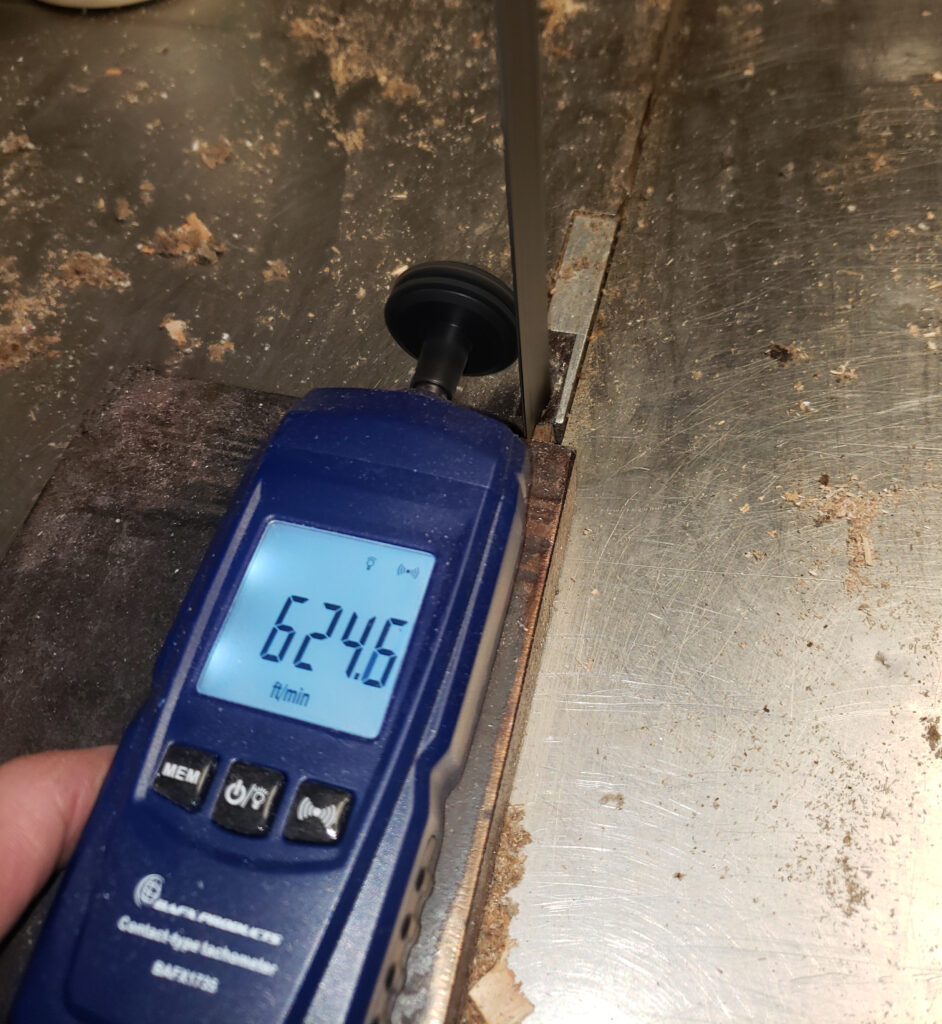
So about the lowest speed that is reasonably usable comes at around 12hz. This gets us down to about 600ft/min. Still too fast but it’ll have to do. We’ll also address a bit of this with a very coarse tooth blade.
1″ .035 – Independence II Band Saw Blades
555546
TPI: 4/6, # Feet: 10, # Inches: 6, Length Fractional Inch: 0
This guy from USA Bandsaw Blades specifically. $90, ouch, hope this thing lasts a while.
https://www.usabandsawblades.com/bi-metal-band-saw-blades/ind-ii-band-saw-blades/1-035-independence-ii-band-saw-blades
Alright now we set P27 to 12hz and wire our metal speed button to X1. Perfect, now when I hit the button the speed changes to 14hz which translates to something like 600 ft/min.
There we go, 3/8 steel, no sweat.
At this point something kind of silly occurred to me. This saw is going to be used for metal probably 80% of the time and wood the rest. Why not just configure the base speed to 14hz and make the button toggle “wood mode”. So that’s what I did. I changed P27 to 40hz. Now the button switches to that and when the button isn’t pressed it goes back to the default speed which is configured with the knob on the front of the VFD which is now turned to 14hz.
Isn’t 40hz too fast? Yeah probably.
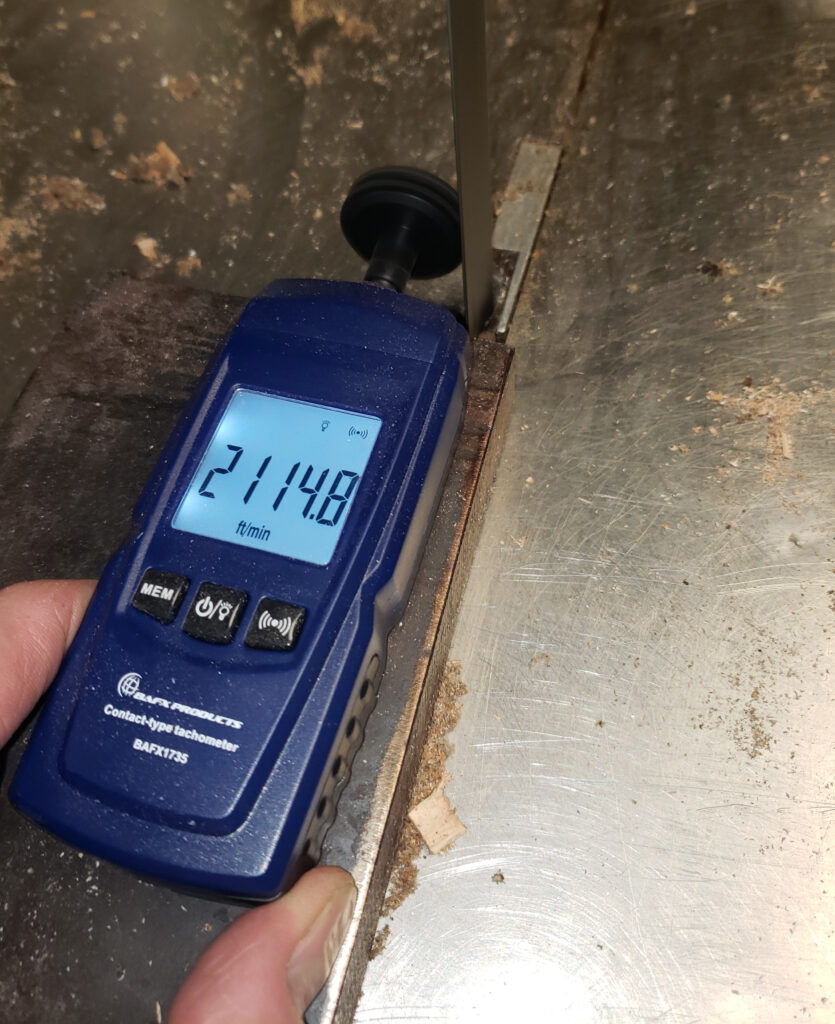
2100 ft/min is probably way too fast but I’ll dial it in more over time. I’m also using this extremely aggressive blade for quick wood cuts. Is this a good idea? Probably not but I really don’t know if it matters. Every specialty has a gate keeper that will tell you everything you’re doing is wrong. I don’t believe any of them anymore. A common approach I see is to estimate how many teeth you have in the work at any time to determine the correct blade. This of course means each blade has a very limited range. This blade has 4 teeth per inch. For wood supposedly 3-6 teeth in the work is ideal. So I need to cut inch thick would at minimum with this.
For metal they say 6-24 teeth at a time in the work so I need to cut metal that’s around 3 inches thick for this to be ideal. Well by my math this lands just about in the middle of the work I’ll be doing. Mostly I don’t want to have to change the blade out to get work done. I usually don’t have a ton of time.
The other concern is will wood wear out this blade prematurely. I have no idea, probably. Eventually I want to upgrade to a carbide blade but as you can imagine those cost a fortune, $284 with tax specifically. Only 3 times what I paid for the saw. I definitely didn’t want to invest in that before I even had this antique saw running or getting the speed right. The $150 for one wood and one metal blade was pushing it.
Oh and yes I did get a wood cutting blade. It’s a 3/8 instead of 1inch depth so it can cut much tighter radii. I only foresee swapping this out when I have a lot of wood working to do.
Also I intend to rip down full timber with this thing. I have a planer and joiner and drum sander (maybe we’ll run through the homemade sander sometime soon, plans available here: https://stumpynubs.com/product/dual-stage-drum-sander/ I’m not affiliated in anyway I just like the youtube channel and the plans were pretty good) and I assume I could save huge amounts of money breaking down full oak trees into lumber myself and probably end up with better quality material anyway.
Power Control
Anyway, what were we talking about? Oh yeah so wood speed. Yeah it may be too fast but with a very aggressive tooth pattern I believe this will reduce the amount of chip blow out we get and the sort of jarring impact of cutting too deep before the next tooth hits, kind of like a chisel taking out a big chunk.
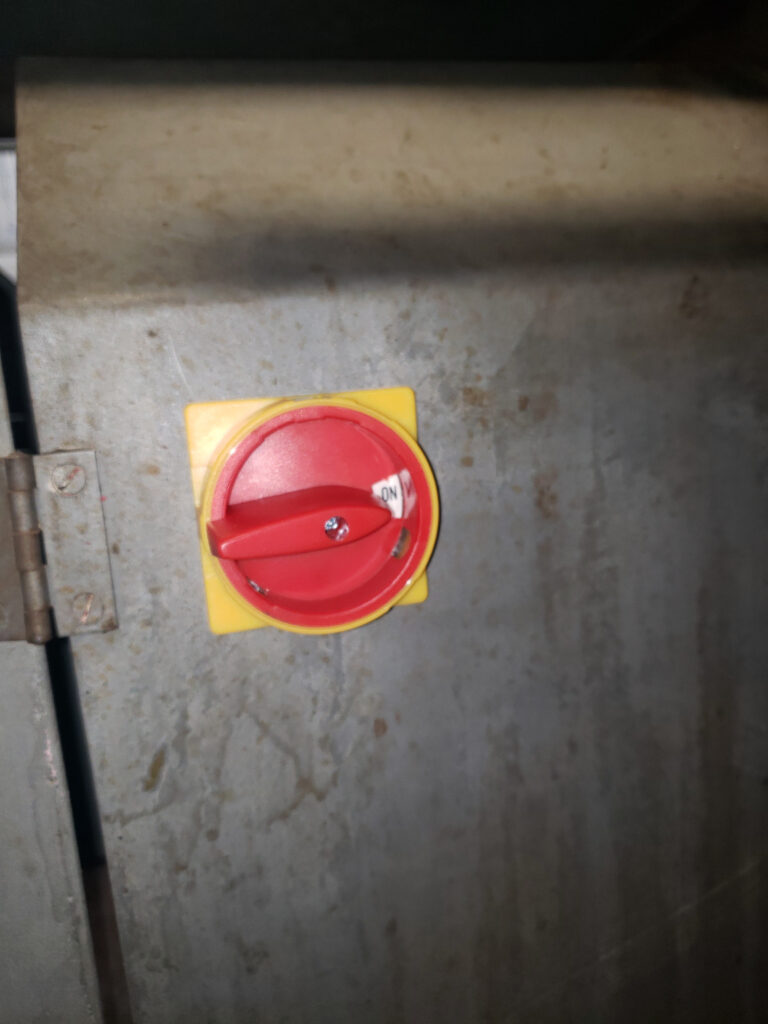
Alright now we need a nice big chunky switch to cut the power. One of the problems with VFD is it’s not really off when you hit the stop button. The VFD is still running, screen is on and fans are running. I don’t like this and unplugging a nema 10-50 220 plug all the time is a pain. So we’re going to add a nice big switch which fully cuts the power.
WHAT EVER YOU DO DON’T THROW THE SWITCH WITH THE MOTOR RUNNING!
As I understand it that will blow up the VFD instantly. I can’t personally verify this is true but I can say I have no intention of finding out.
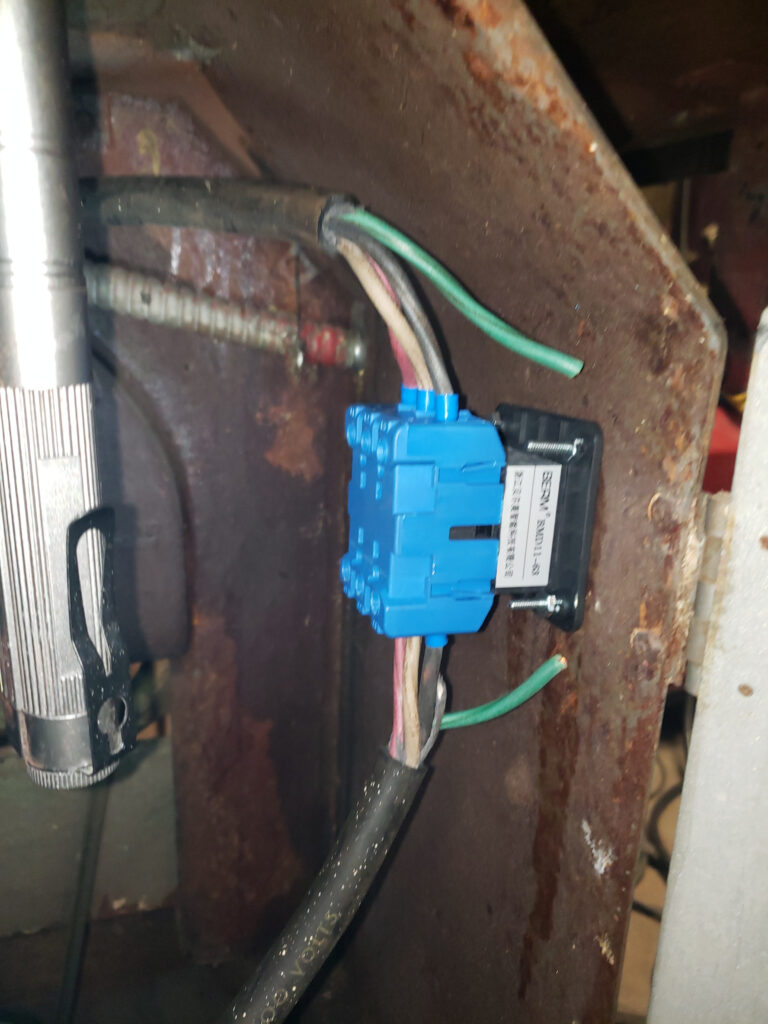
Really nothing to adding this thing. Cut the cable, ferrule each wire, match the wire on one side to the wire on the other side in the terminals and install. Ignore the green wires, they aren’t connected to anything anywhere. Technically the white wire is a ground and the red and black are hot.
Lastly make it sort of pretty:
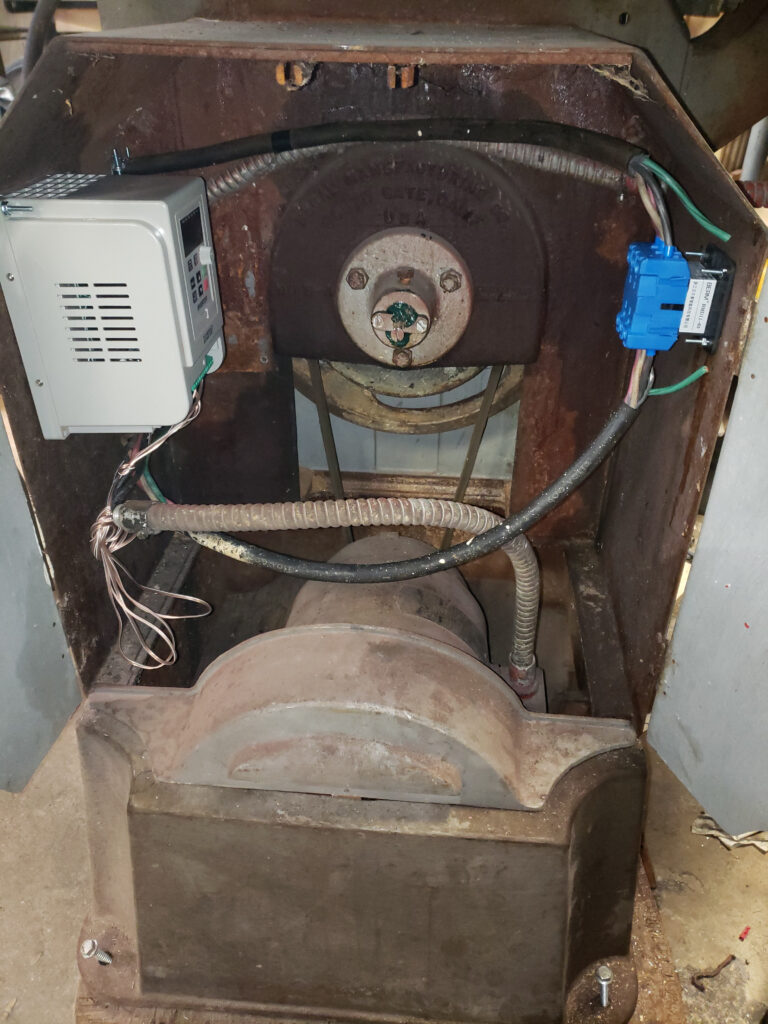
Is it perfect? Well what is. It’s good enough though. You may wonder about the crappy speaker wire. It’s the just the signal wire from the buttons, no noteworthy current or anything.
So that’s the bandsaw done’ish. Now it’s easy to use and ready to go. However there are a few more things I would like to do.
Future plans
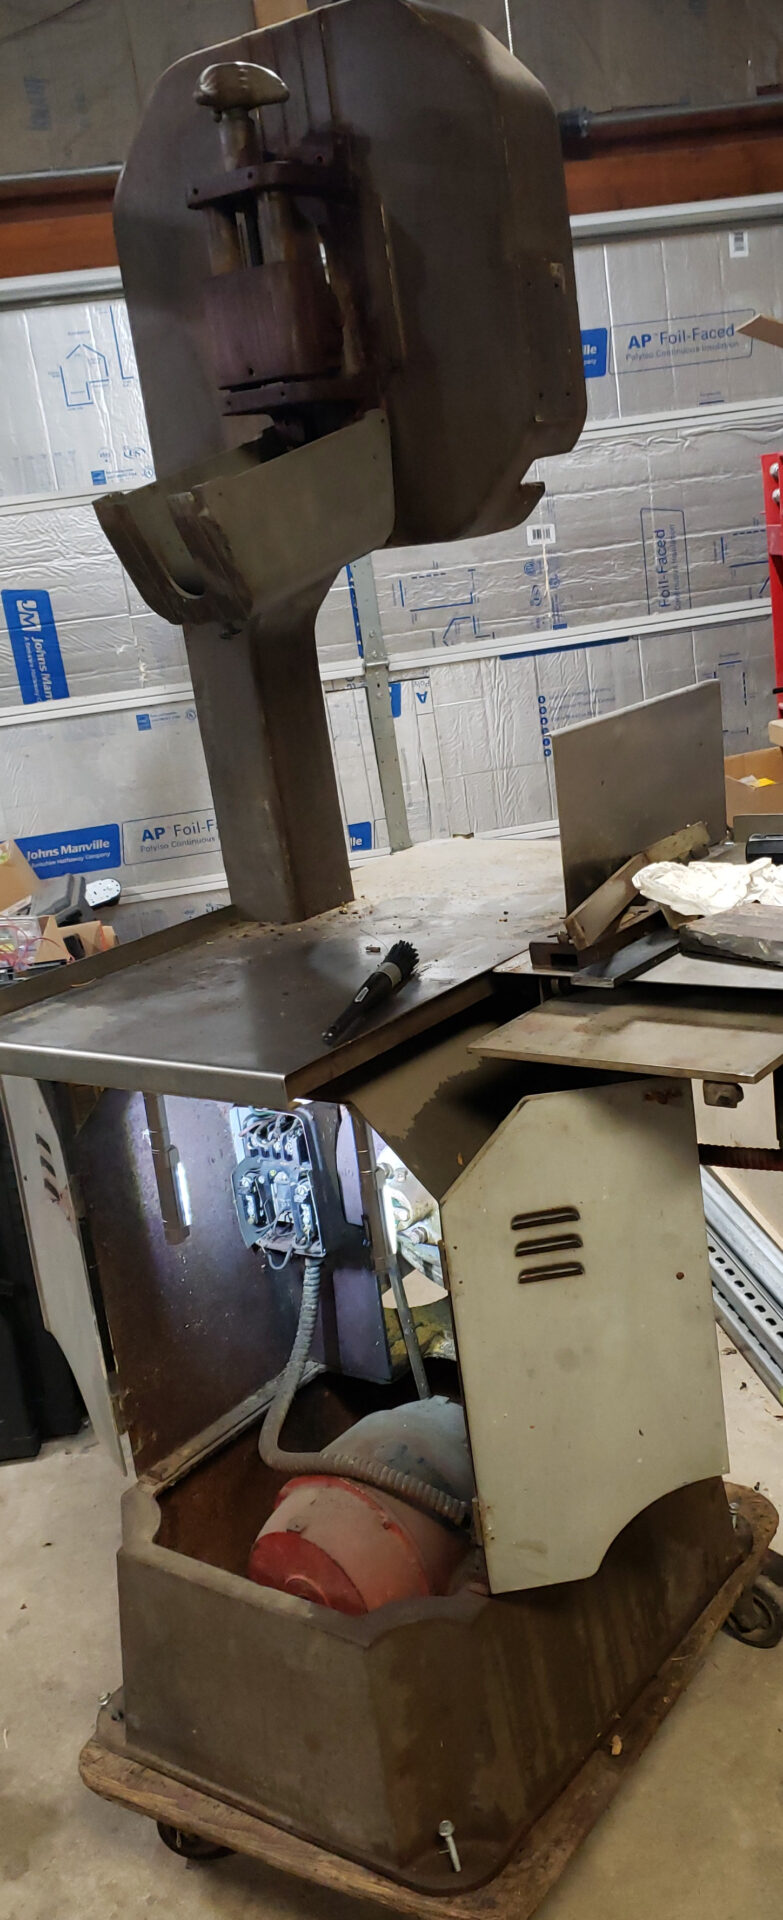
For one, the saw came on a very thick piece of plywood with 4 rubber casters. I would guess this thing weighs close to 1000lbs. It’s probably 100 years old so that is all cast iron, not aluminum. This means the casters flatten out under the weight and it’s more than a small chore to get it rolling. I have shopfox wheeled bases on all the other heavy machines so I’ll be getting one of those for this too eventually.
Second, it could use some more mechanical upgrades.
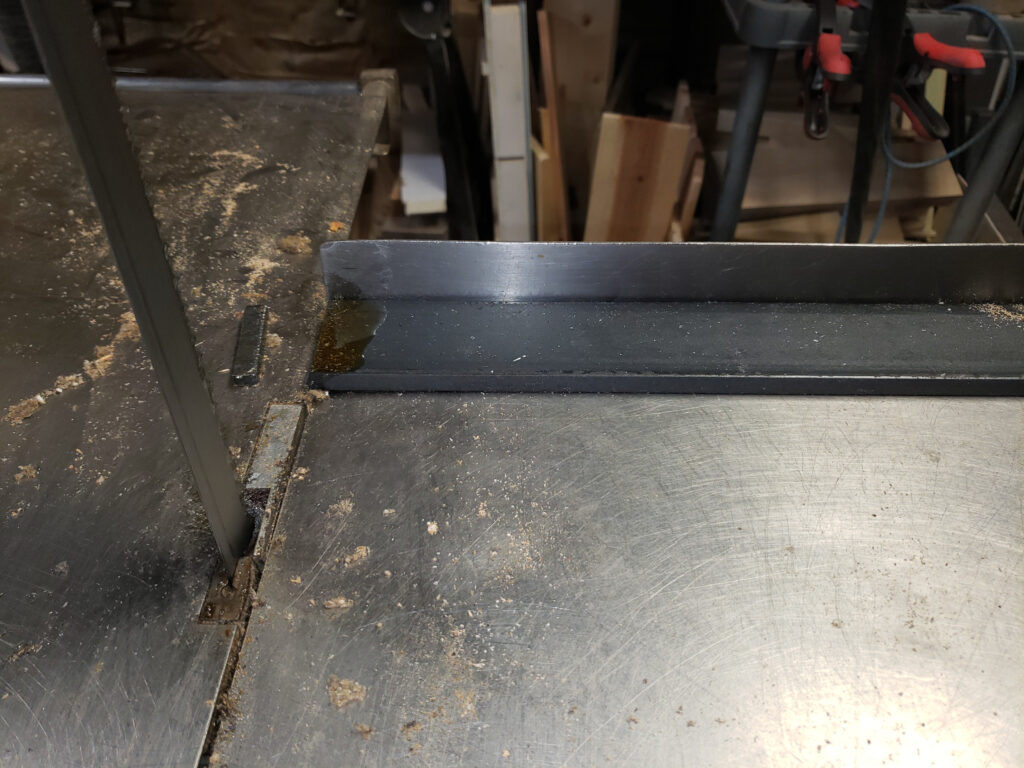
The fence is no where near square to the blade, probably 15 degrees off, and the design of it offers no way to correct this. I’m not sure if I want to fix this one or make a whole new one.
Blade guides would be a really good idea. Right now it just has some kind of bearing material that isn’t even actually in contact with the blade. It needs a ball bearing on both the left and right side of the blade as well as the back of the blade to keep the blade from moving in any direction. It needs one of these on the top and bottom and each bearing needs to be adjustable. Also the top blade guide arm only drops down to about 10 inches from the table. Ideally you want this very close to the top of the material you are cutting.
A cooling system would be a huge upgrade and would save a load of money in the long run because the blades will last much longer. This is a complicated upgrade. I would need a way to catch the coolant on the table and some kind of wiper system under the table to collect it off the blade and it all needs to run into a tank. Then a pump and an adjustable nozzle attached to the top blade guide arm. Possibly an oil skimmer. I’ve also heard most kinds of metal cutting coolant goes rancid or solidifies in the lines if it isn’t used regularly and I don’t know how often I will use this so there’s only one way to deal with this. I will need a system to activate the pump daily automatically. This will mean a small bit of brains and bypassing our power cutoff switch.
And lastly I want an auto-feed mechanism for very large, long running cuts. Just a leadscrew with a half nut that can be disengaged for normal use and a dial for ft/min cutting speed, not blade speed but how fast the material is shoved into the blade. Possibly including some kind of work holding device as well.
So that’s it for now, keep an eye out for the upcoming upgrades. Subscribe below to notified when new articles are published. Generally there should be at least one per week.
One Reply to “DIY – Lets Hack a Bandsaw – Part 2”